This guide helps you setup correct access permissions for files and folders efficiently
Windows + IIS
Applies to Windows XP, 2003, 2008, 2013 or newer with IIS6, IIS7, IIS8 or newer installed.
This example has been performed on Windows2003 + IIS6. It works for
other versions of Windows, but appearance of permission configuration
windows may vary.
During installation
When you're asked to set write permissions during the initial setup, we would recommend to set write and modify permissions to all KMP files. Don't be afraid about security you will remove most of them after installation.
- Right-click on the folder that contains all KMP files.
- Select "Properties".
- Click on the "Security" tab. If you do not see it, you probably do not have enough rights to change file permissions, so please contact your system administrator.
- When you install IIS, it adds a user to the system which permissions define access level for web applications. By default it is Internet Guest Account (or IUSR_MACHINENAME, you can see that on the screenshot it is IUSR_IIS6 since the IIS6 is the server name). You need to grant Internet Guest Account with modify and write permissions.
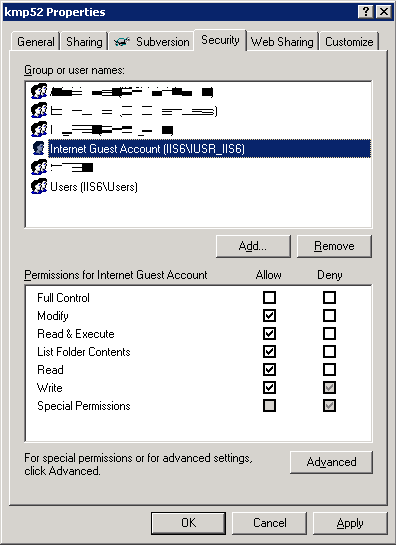
If granting permissions to this user doesn't help, try to grant permissions to the "Users" user group. That should work.
- After this you can proceed with the installation of KMP and finish it.
In Windows XP you have simple file sharing enabled by default. You need to disable it in order to change file and folder permissions.
- Go to My Computer.
- Click on the Tools>Folder Options menu item.
- Select the View tab.
- Under Advanced settings, scroll down to the bottom and uncheck Use simple file sharing (Recommended).
- Click Ok.
After installation
- Delete the /admin/install/ folder. It is no longer needed and may be a security threat if you'll leave it as it is after installation.
- Open the security properties of the folder that contains all the KMP files once again.

- Remove modify and write permissions from Internet Guest Account.
- Login to the KMP.
- Go to Administration > General Settings > File Permissions.
- You will see that KMP asks you to give it write permissions to several folders.
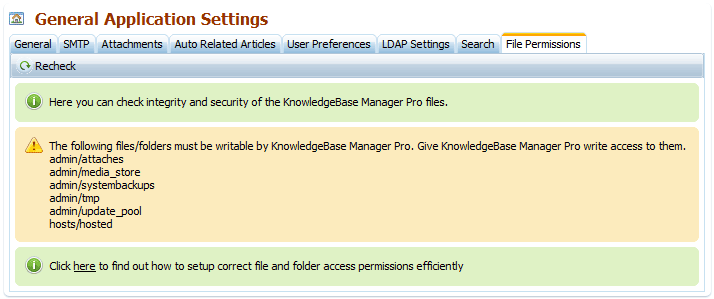
- Open properties of each folder from this list and add write and modify permissions for Internet Guest Account.
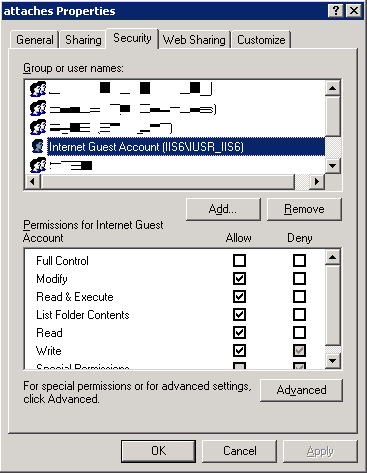
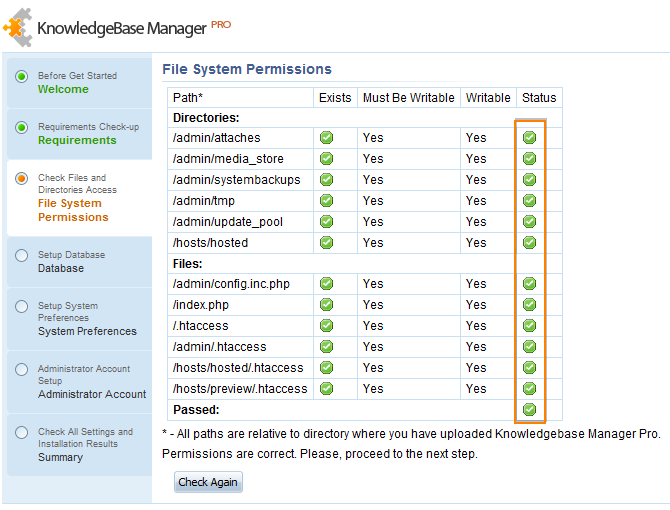
If granting permissions to this user doesn't help, try to grant permissions to the "Users" user group. That should work. - Click "Recheck" to be sure that everything is set up correctly.
Windows + Apache
This example has been performed on Windows 7 + Apache. It works for other versions of Windows, but appearance of permission configuration windows may vary.
During installation
Apache generally runs on the host computer as the User that it was installed under. So when you launch the installation you will see that KMP has writable access to all files.
So you do not need to do anything about it right now.
After installation
After installation you need to remove write access from most KMP files.
- Delete the /admin/install/ folder. It is no longer needed and may be a
security threat if you'll leave it as it is after installation.
- Launch the Task Manager (you can use the Ctrl-Shift-Escape combination for that)
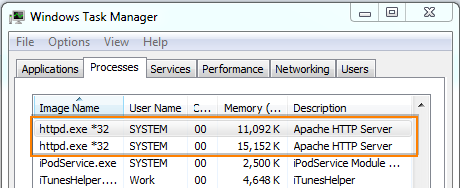
- You can see that Apache runs under SYSTEM user (this user name may be different on your server). Open the security properties of the folder that contains all the KMP files and click the "Edit" button.
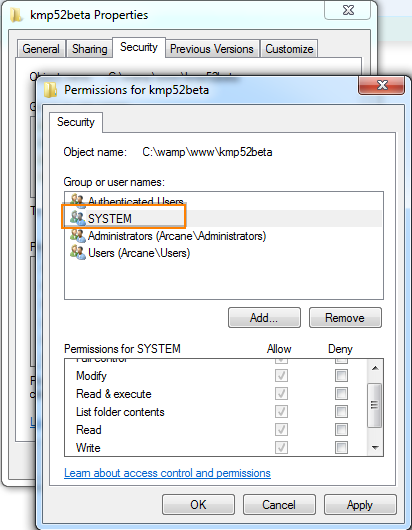
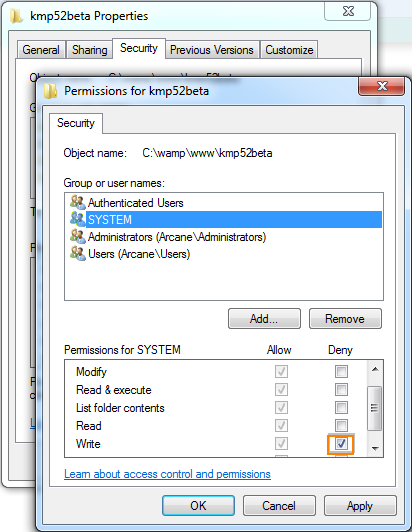
- What you need to do is deny SYSTEM user write access to main KMP folder. This denial will be inherited by all child files and folders. Click on checkbox like shown on the next screenshot and click OK.
- Login to the KMP.
- Go to Administration > General Settings > File Permissions.
- You will see that KMP asks you to give it write permissions to several folders.

- Open security properties of a folder from this list, for example "attaches". Click "Advanced" and then "Change Permissions...".
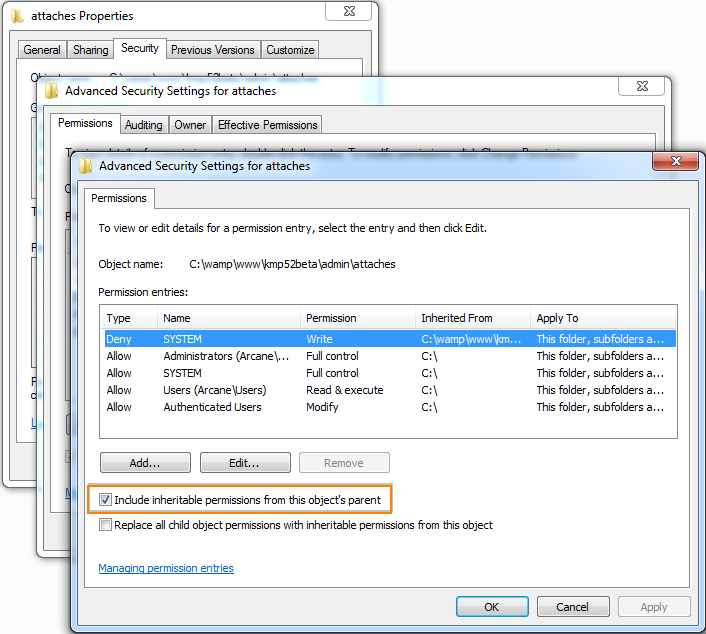
- Uncheck the "Include inheritable from this object's parent". You will get a confirmation window.
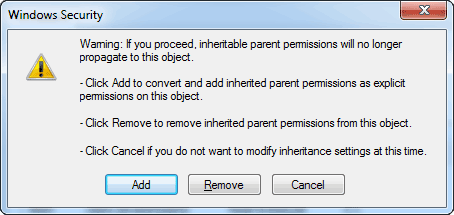
- Click on the "Add" button to copy permissions from parents to this folder.
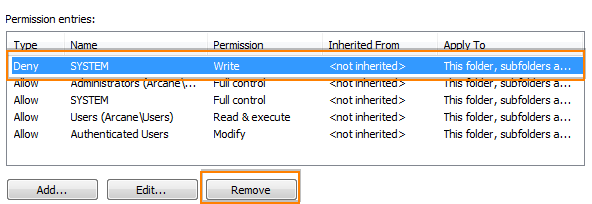
- Remove the entry that denies write permission for the SYSTEM group.
- Click OK in each dialogue window.
- Perform 8-12 steps for each folder listed here:
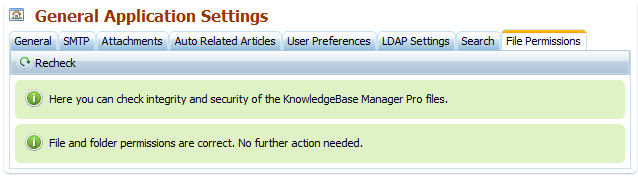
- After that you can go to Administration > General Settings > File Permissions and see that you need to remove write permissions from the hosts/hosted/.htaccess file. Remove them and click "Recheck" in KMP control panel, you will see that all permissions are set correctly.
Linux/UNIX
During installation
- Open shell session with the server where you've uploaded KMP.
- Go to the folder that contains all KMP files.
- Run the following command to grant KMP with write permissions to all necessary files.
After installation
- After installation you can remove some write permissions that are not needed anymore:
- Delete also the /admin/install folder.
Note that chmod 777 is not a must, you can use chmod 755, but first you need to run chown command to make Apache the owner of those files.
Go to the folder with all KMP files and run the following command.
Usually Apache runs as www-data user, but it may be different on your server.
Unix/Linux without shell access (setting permissions with FTP software)
If you're setting permissions using your FTP software, note that most FTP clients allow setting permissions in a file properties window, which can be opened by right click on the file and choosing "Properties" or "Settings" item in pop-up menu. FTP clients usually use the same file permissions scheme as Linux/UNIX shell does.
During installation
Folders that require write permissions (chmod 755 or chmod 777):
- /admin/attaches
- /admin/media_store
- /admin/systembackups
- /admin/tmp
- /admin/update_pool
- /hosts/hosted
Files that require write permissions (chmod 644 or chmod 666):
- /admin/config.inc.php
- /index.php
After installation
Remove write access for the following files (chmod 444):
- /admin/config.inc.php
- /index.php
 Categories
