Graphic User Interface
- Logging in
- Homepage
- Work area
Logging in
Form Maker Pro requires a username and password to log in to the system:
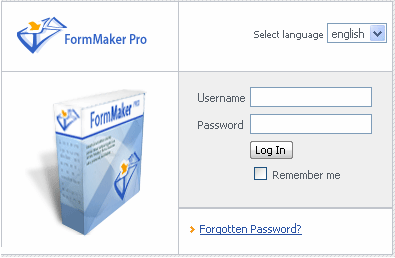
Username/Password:
Enter the username and password to access your account;
Remember me checkbox:
Allows to store the username and password on this computer,so there will be no need for you to enter your username and password on your further logins. ("Cookies" support should be enabled on your computer).
Warning!
If you share your computer with others they will be able to access your account without entering username and password

Click this link to restore your password in case you forgot it. Your password will be sent to your email address.
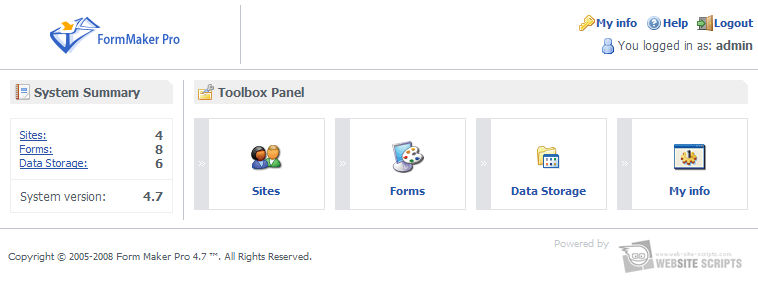
Homepage
Homepage is the start-up page containing your account statistics in the "System Summary" column and a toolbar enabling quick access to any part of the system in the "Toolbox Panel" column.
Work area
The Work Area consists of a header menu, main menu, work area, and a key bar .
Header menu
- Logotype- return to Home Page;
- My Info - access your account information editing link;
- Logout - logout from the work area;
- Status Line - the name of the user currently logged into the system;
Main menu
The Main menu enables quick navigation through the system.
Work Area
The Work Area includes the following components - caption line, tables and forms.
1. Caption Line

provides information on your exact location in the system. It contains the name of your current page and its full path, which you can use for direct navigation through the system.
2. Tables
The Form Maker Pro system abounds has numerous, specially designed for manipulating data in a precise and quick way.
Table elements:

- Table header - table header;
- Group actions - allows the operation with multiple data. Group operating is applied to the checked data strings.
- Sorted column - the column the data is sorted by. Usually its captionis is colored.
- Sort Order - the icon which displays sorting direction.If the column header has an icon SortOrder this means that this column is not sorted yet.
- Unsorted column - the column which can't be sorted.
- Action buttons - data operating icons:
 - open the element for viewing and editing;
 - preview the element;
 - open element preferences;
 - delete the element;
 Down - shift the element down;
 Up - shift the element up;
In order to simplify your work, all the icons mentioned above are provided with pop-up help.
- Table Navigation - table navigation, occurs when the data takes more than one page.
 one page forward/back;
 active page;

 link icons which make it possible to go a few pages forward and back. It's also possible to go to the specific page by clicking its number. For multiple pages (for example, in log templates) you can use quick search.
- Action buttons -buttons to add elements to the table.
Forms
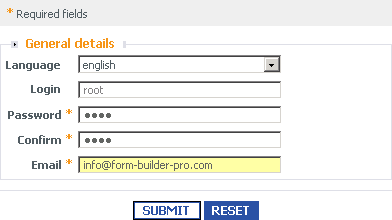
All forms have a header, confirmation button and reset button. Some forms also have:
- the  button (skips all changes and gets to you back to the previous page)
and
- the  Button button (should be pressed before saving information).
The majority of forms have fields marked with a star  . These fields are required to be filled in, otherwise an error occurs and the form will not be submitted.


